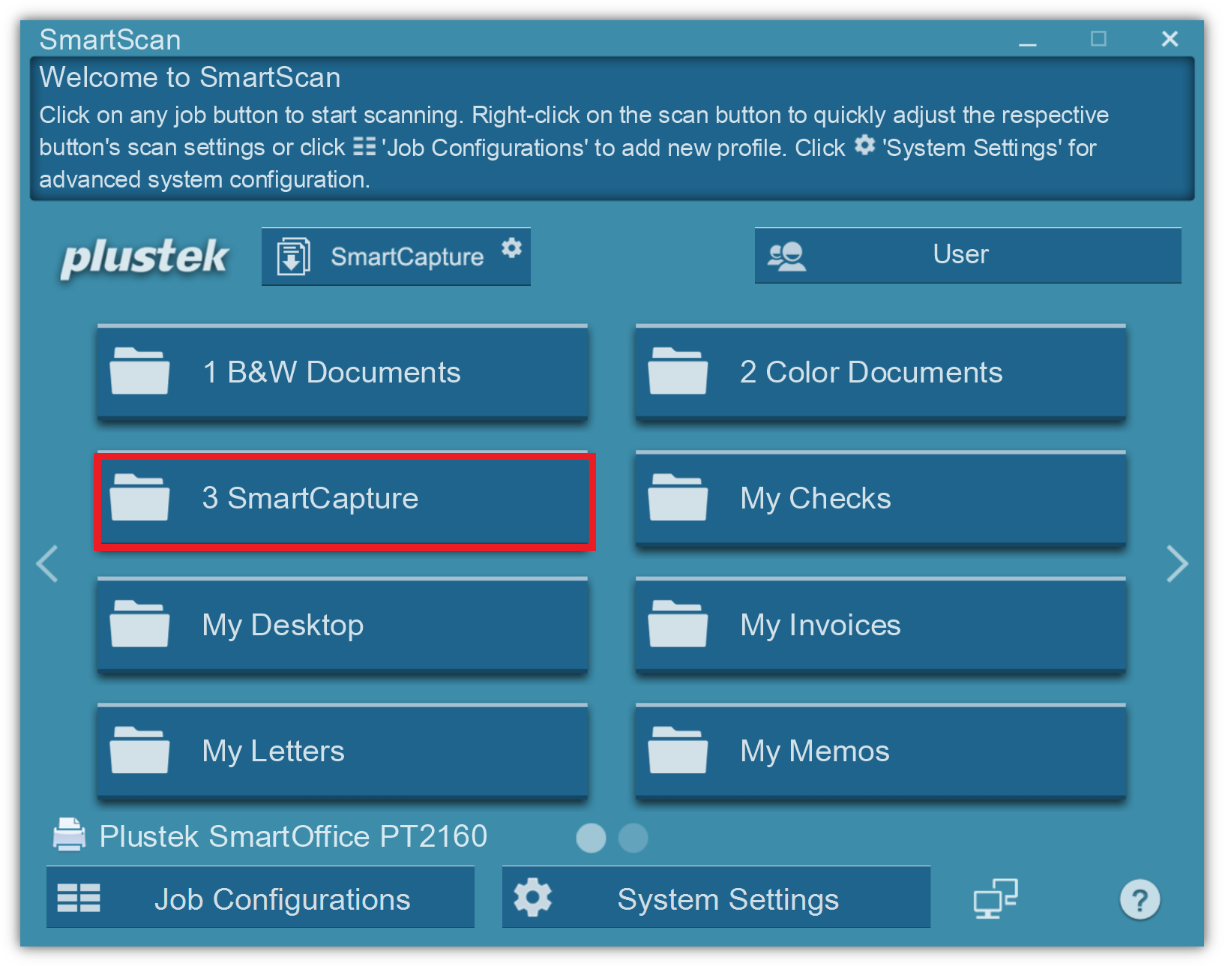
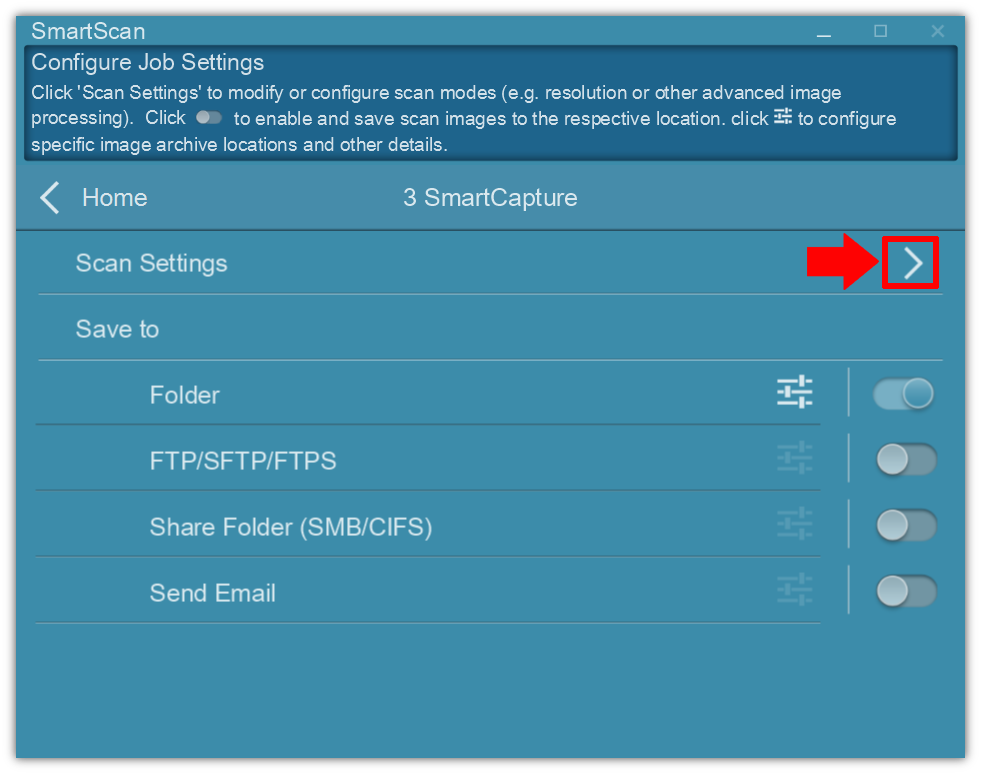
Example Scan Button: "3 SmartCapture"
For the purposes of this guide, a scan button has been preconfigured as an example. We'll use the scanner button labeled “3 SmartCapture” to demonstrate how the process works.
If you’d like to check or customize this button’s settings, follow these steps:
Right-click the scan button within the SmartScan software interface.
A settings menu will appear, where you can:
•Change the job name (what the button is called)
•Modify the scan parameters (e.g., resolution, file format, duplex mode)
•Adjust which SmartCapture task the button triggers
These settings can be updated at any time to match your specific scanning and data capture needs.
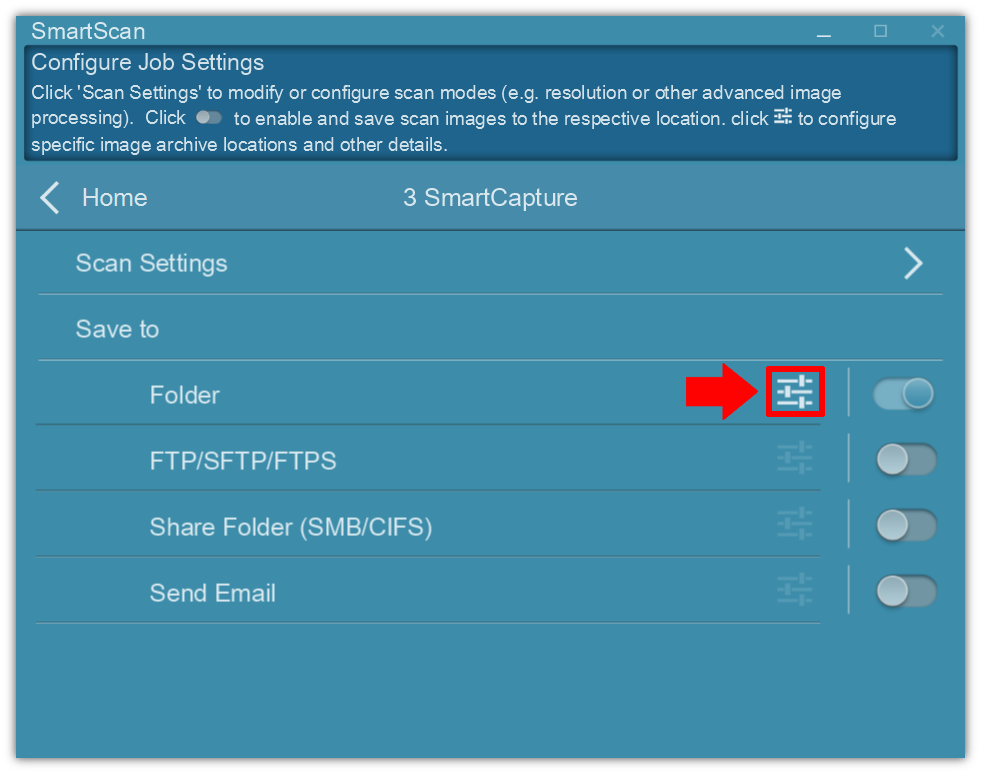
Selecting the Correct Export Option for SmartCapture
In the export settings menu, you can choose from various output options, such as saving to a file, sending via email, or uploading to cloud storage.
However, to activate SmartCapture, you must select the “Folder” option as the export method.
Why is the “Folder” option required?
When you select “Folder,” the scanned documents are saved locally to a specified folder on your computer. SmartCapture monitors this folder, and once a file is saved there, it will:
•Open the scanned document
•Capture and extract key data (based on your preset template)
•Save the extracted data (such as text, numbers, or index fields) into a structured format (e.g., CSV, XML, or database) in the same or a related local folder
This automatic flow only works when the scanned output is directed to a local folder, not to email or external apps.
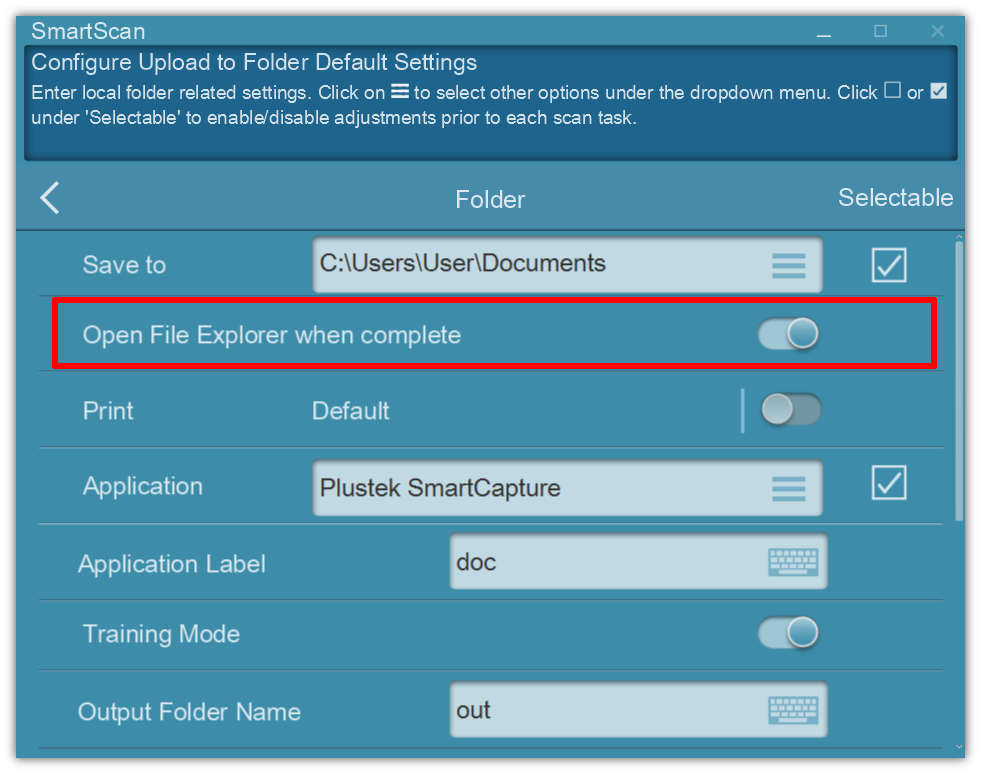
To automatically open the folder containing your scanned files right after scanning:
![]() Enable the “Open Folder After Scanning” option.
Enable the “Open Folder After Scanning” option.
This will launch File Explorer and display the folder where your scanned documents were saved — making it easy to view or check the files immediately.
💡 This is especially useful if you're reviewing multiple scans or preparing files for further processing with SmartCapture.
You can also print scanned documents automatically by enabling the “Print after scanning” option in the settings.
Once enabled:
The scanned document will be sent to a printer immediately after the scan is complete.
You can select a specific printer from the list, or leave it set to default, in which case your system’s default printer will be used.
This feature is useful if you need a physical copy right after scanning, such as for receipts, forms, or backup records.

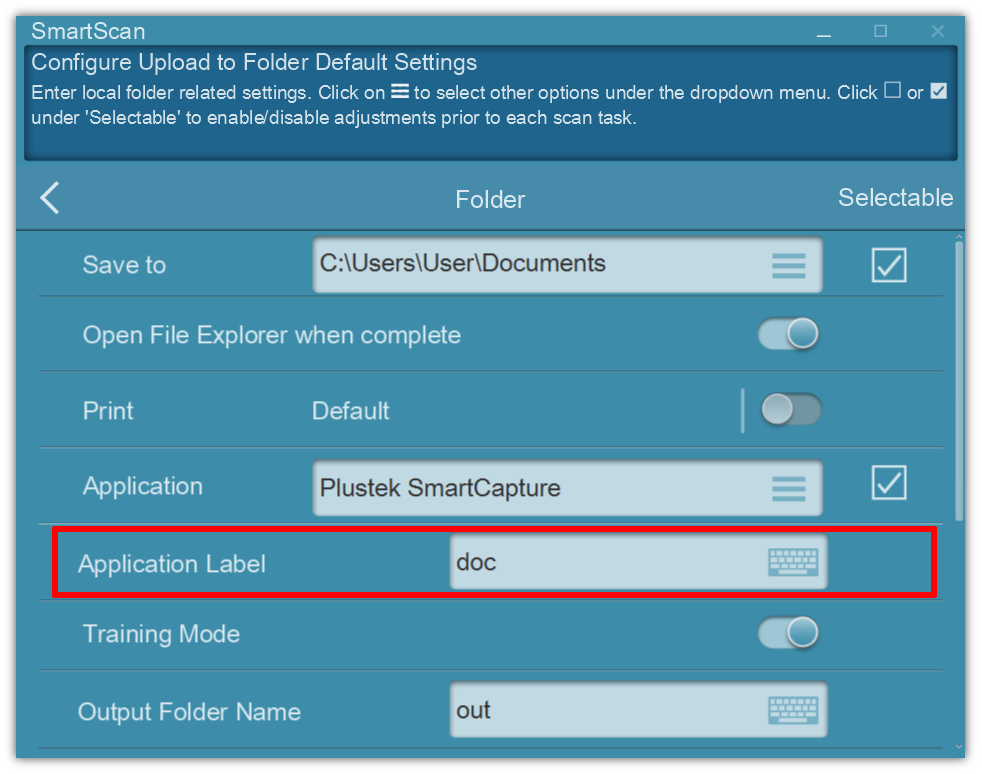
You can use this option to define the “Application Label” — a custom name or identifier that helps you recognize the scan job or workflow more easily within the application.
This label is especially useful when you have multiple scan profiles or need to organize tasks by type, such as invoices, ID cards, or forms.
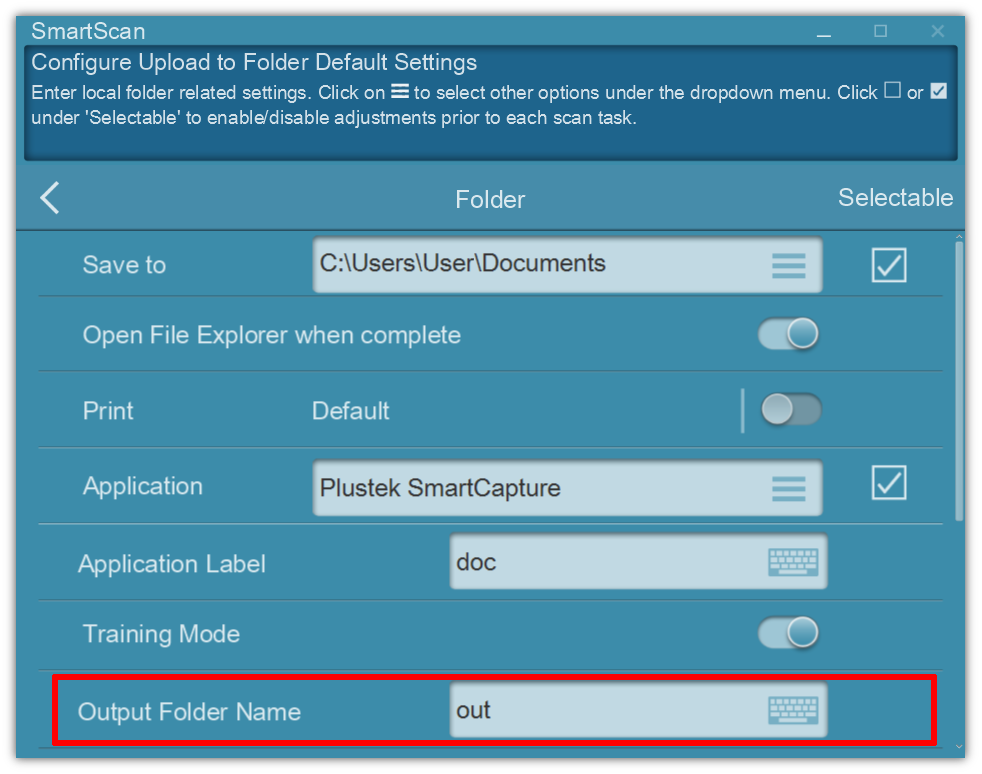
Defining the Output Folder & Transferring Settings
In this section, you can set the name of the output folder where your scanned and extracted files will be saved.
This folder will be created inside the file path you previously defined.
Exporting and Importing Extraction Settings
To reuse your SmartCapture configuration on another computer:
Click the Export Application button to save your current extraction settings (including templates, anchor points, and index fields).
On the target computer, click the Import Application button to load those settings.
This feature makes it easy to deploy the same SmartCapture setup across multiple workstations without manually reconfiguring each one.
Adjusting OCR Language Settings
By default, the OCR language is set to English. If your documents are in other languages, you can adjust the settings as follows:
How to Change the OCR Language
Click the Scan Settings button.
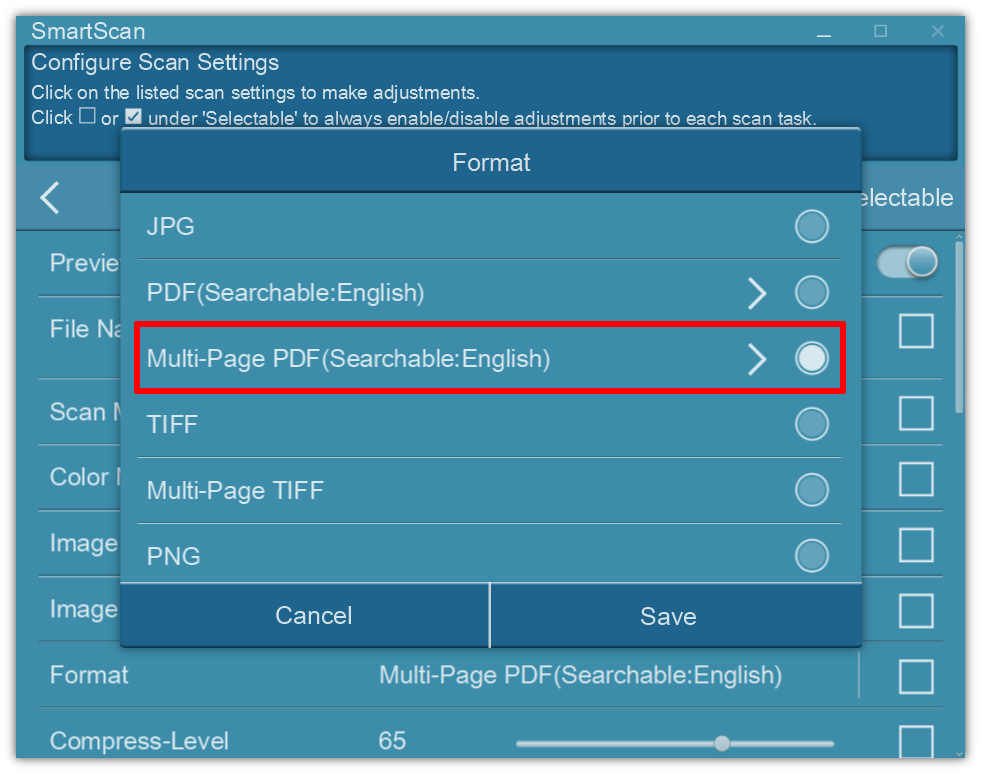
Go to the Format tab.
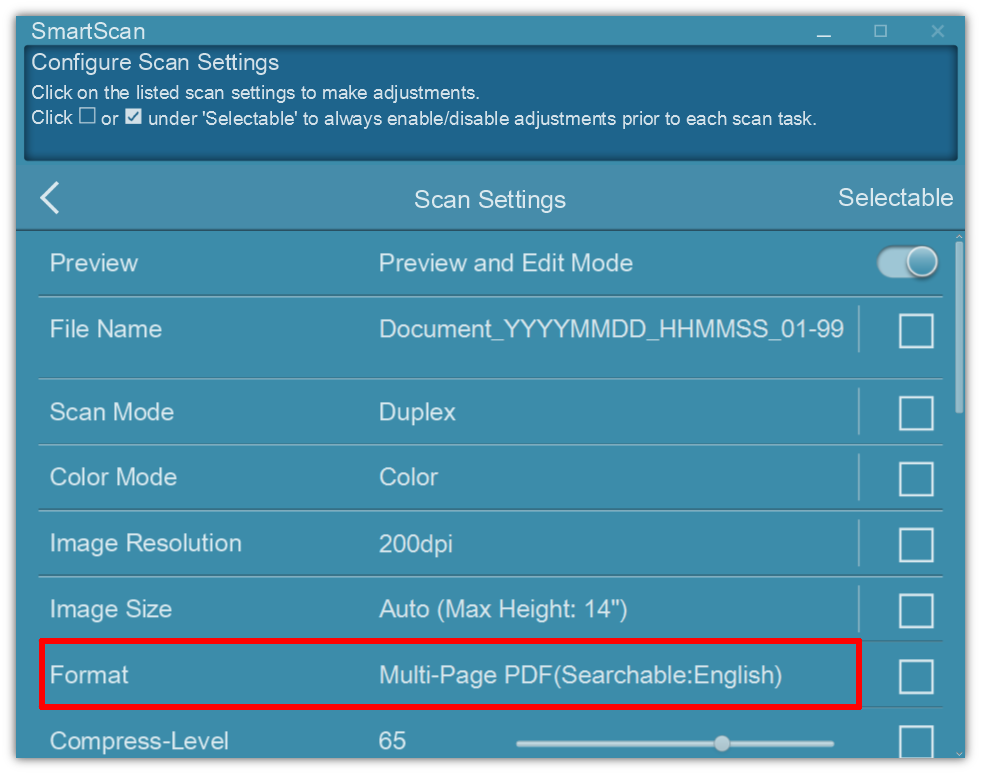
Under Output Format, choose either:
Multi-Page PDF (Searchable: English)
PDF (Searchable: English)
From the Language Selection dropdown, select your preferred OCR language(s).
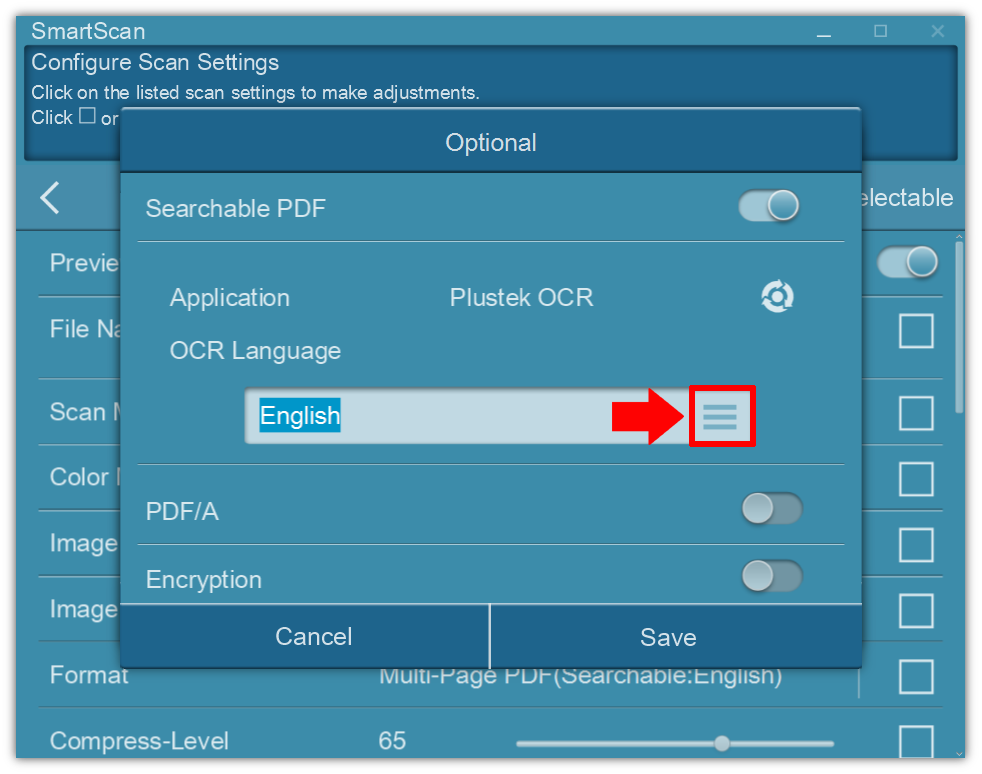
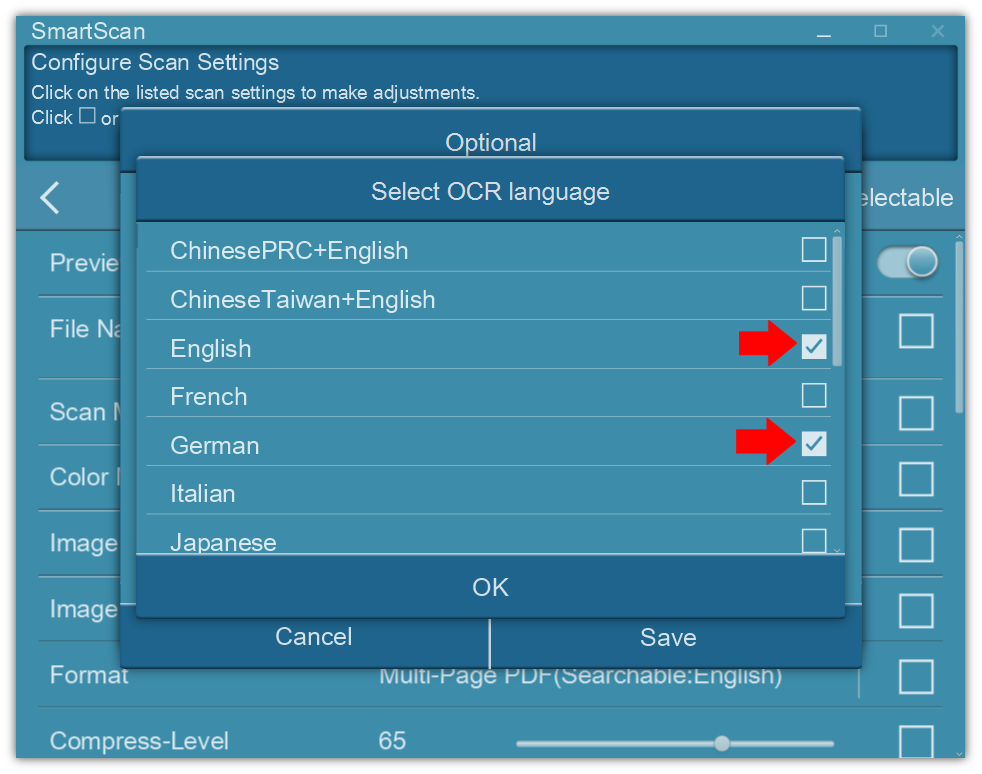
![]() Multiple language selection is supported.
Multiple language selection is supported.
⚠️ Note: Selecting multiple languages may slow down the OCR process and affect overall scanning performance.
Ready to Scan
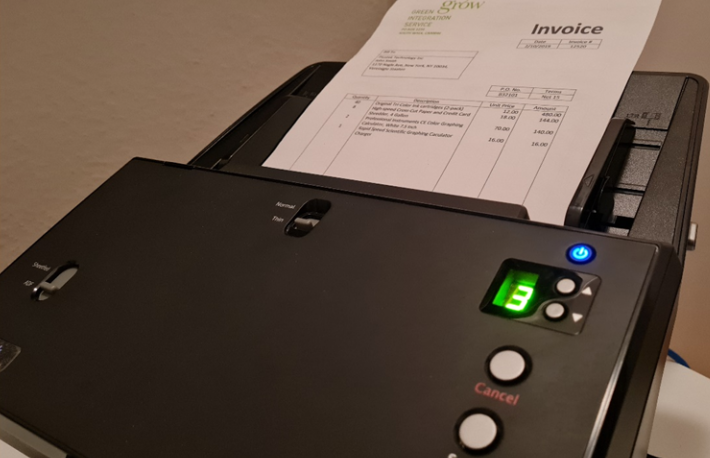
Now that all SmartCapture settings have been configured, you're ready to begin scanning.
Simply place your documents into the scanner’s input tray.
In this example, we are using the Plustek SmartOffice PT2160 scanner, but the steps apply to other compatible Plustek models as well.
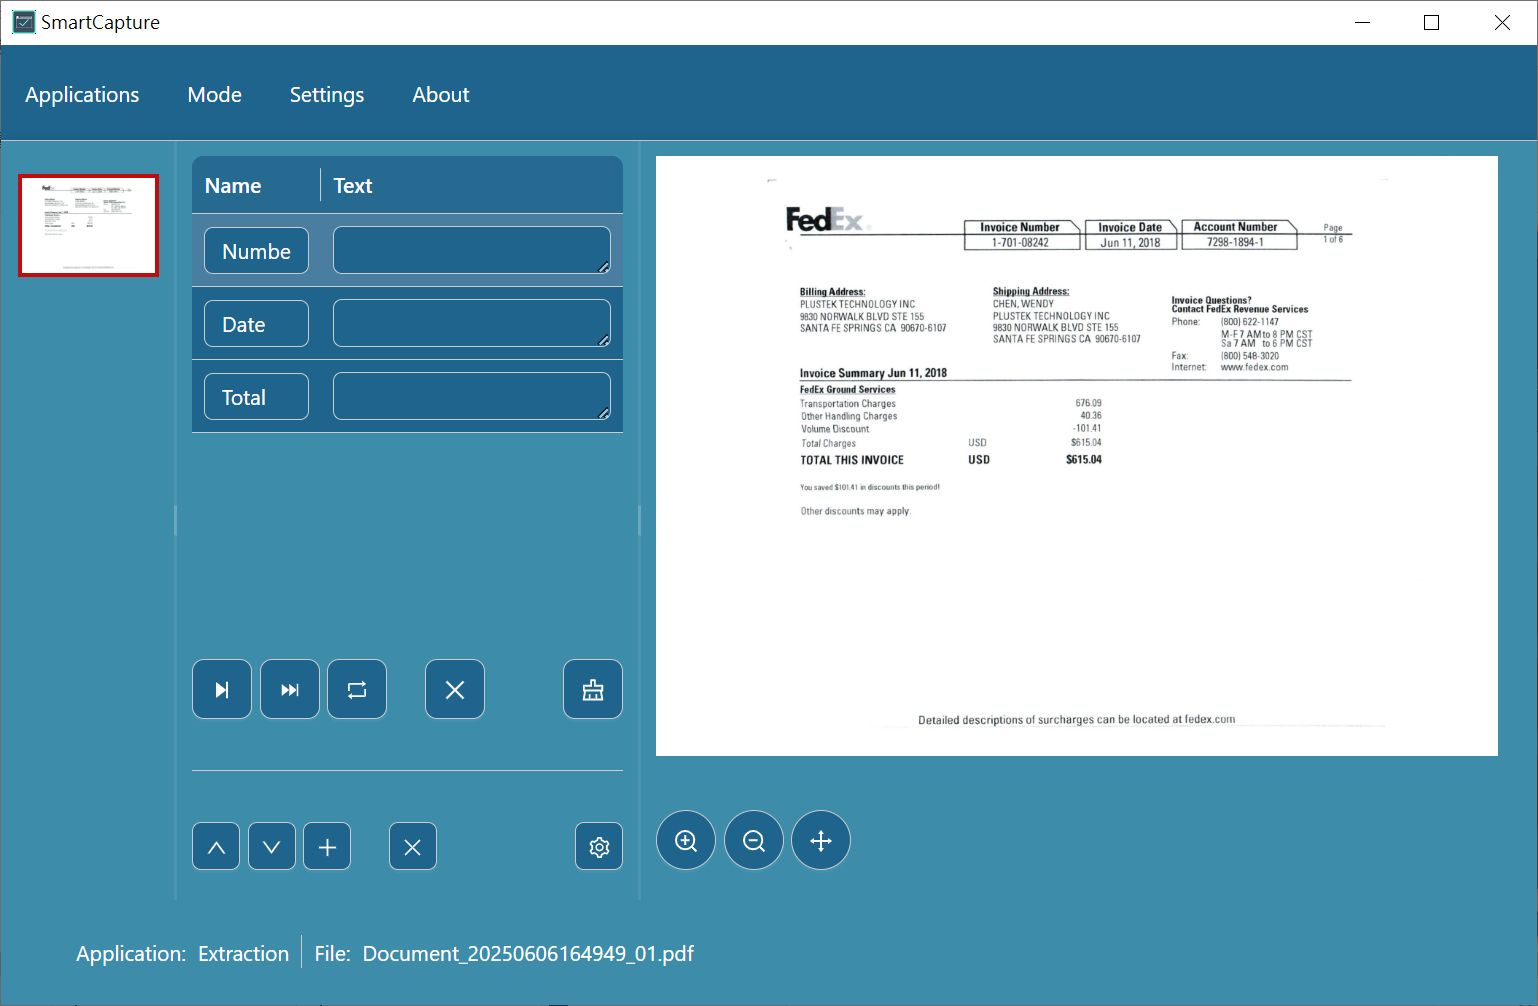
Once the document is scanned, SmartCapture will automatically begin processing it for data extraction based on your saved settings.
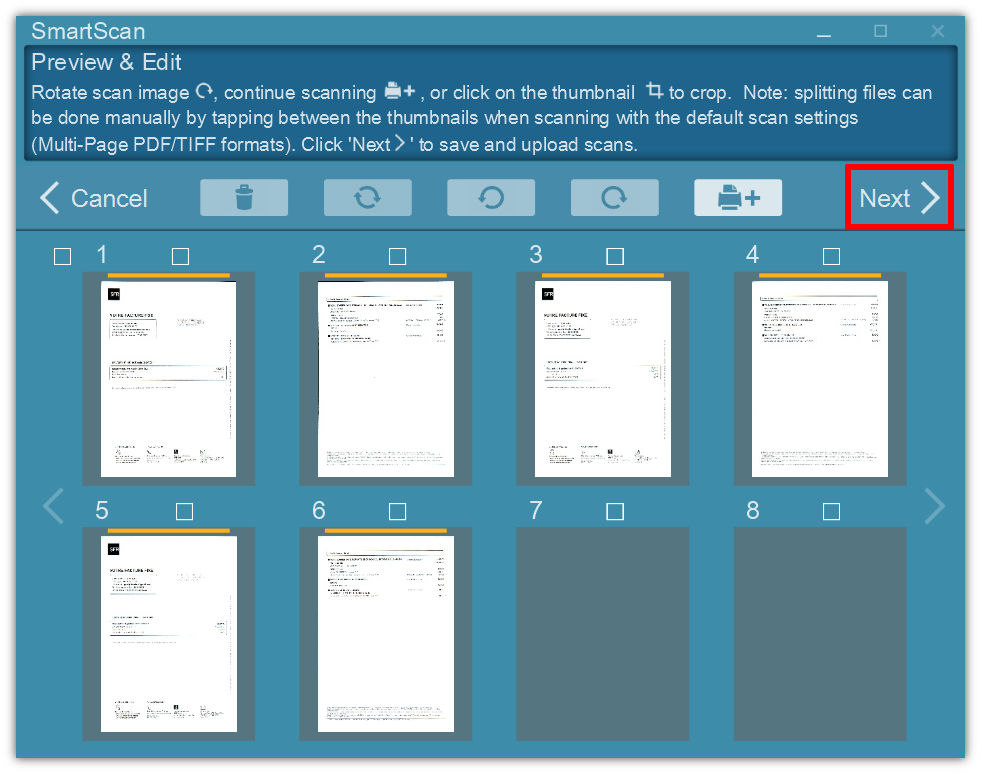
Here, you can make adjustments to the scanned images — such as cropping, rotating, or deleting pages if needed.
After you've finished making all necessary changes, simply click “Next” to continue to the data extraction step.
Once the OCR process finishes successfully, SmartCapture will open automatically in a new window to begin extracting and displaying the data from your scanned documents.