 Brazil
 Latin
America
Latin
America USA &
Canada
USA &
Canada Australia
 China
China India
India Indonesia
 Japan
Japan Korea
Korea Taiwan
 Vietnam
 Austria
 France
 Germany
 Italy
Italy Netherlands
 Other
Europe
Other
Europe Poland
 Russia & CIS
 Spain
Spain Switzerland
 United Kingdom
 Saudi Arabia
  Turkey
 Israel
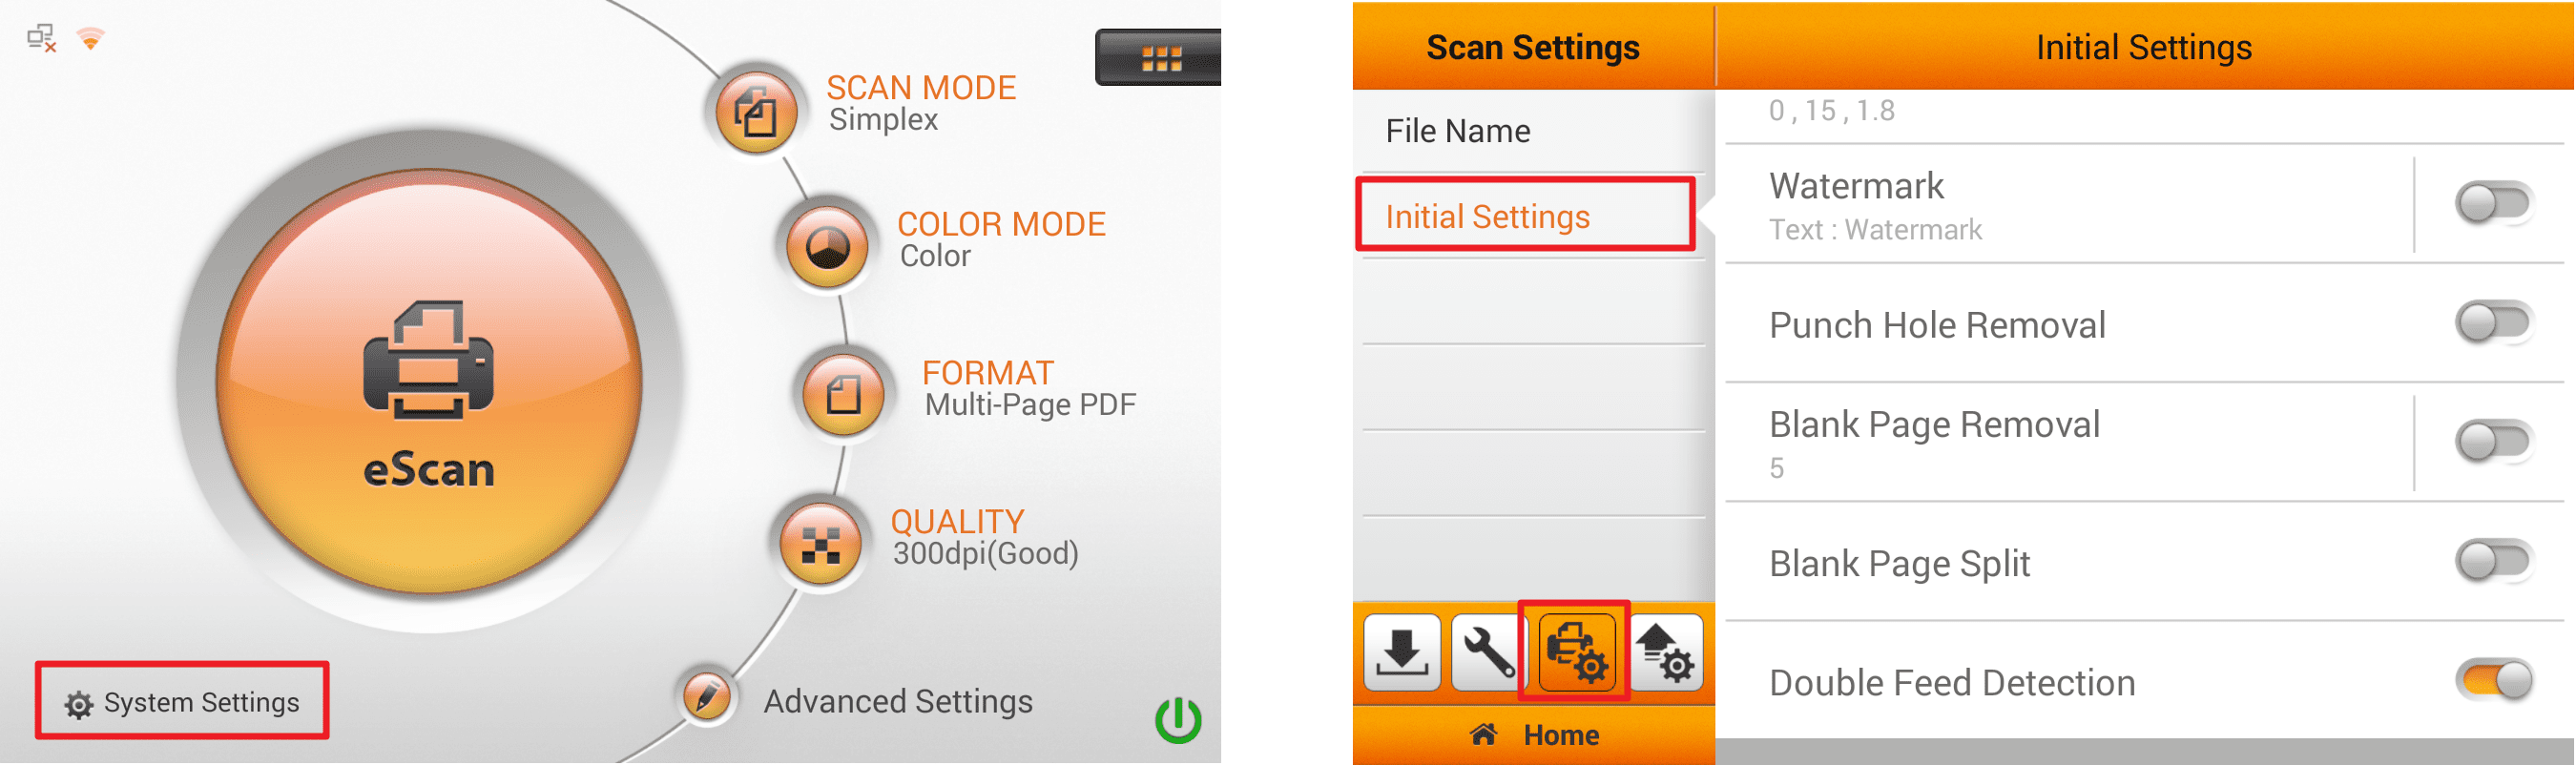 Click to enlarge image
×
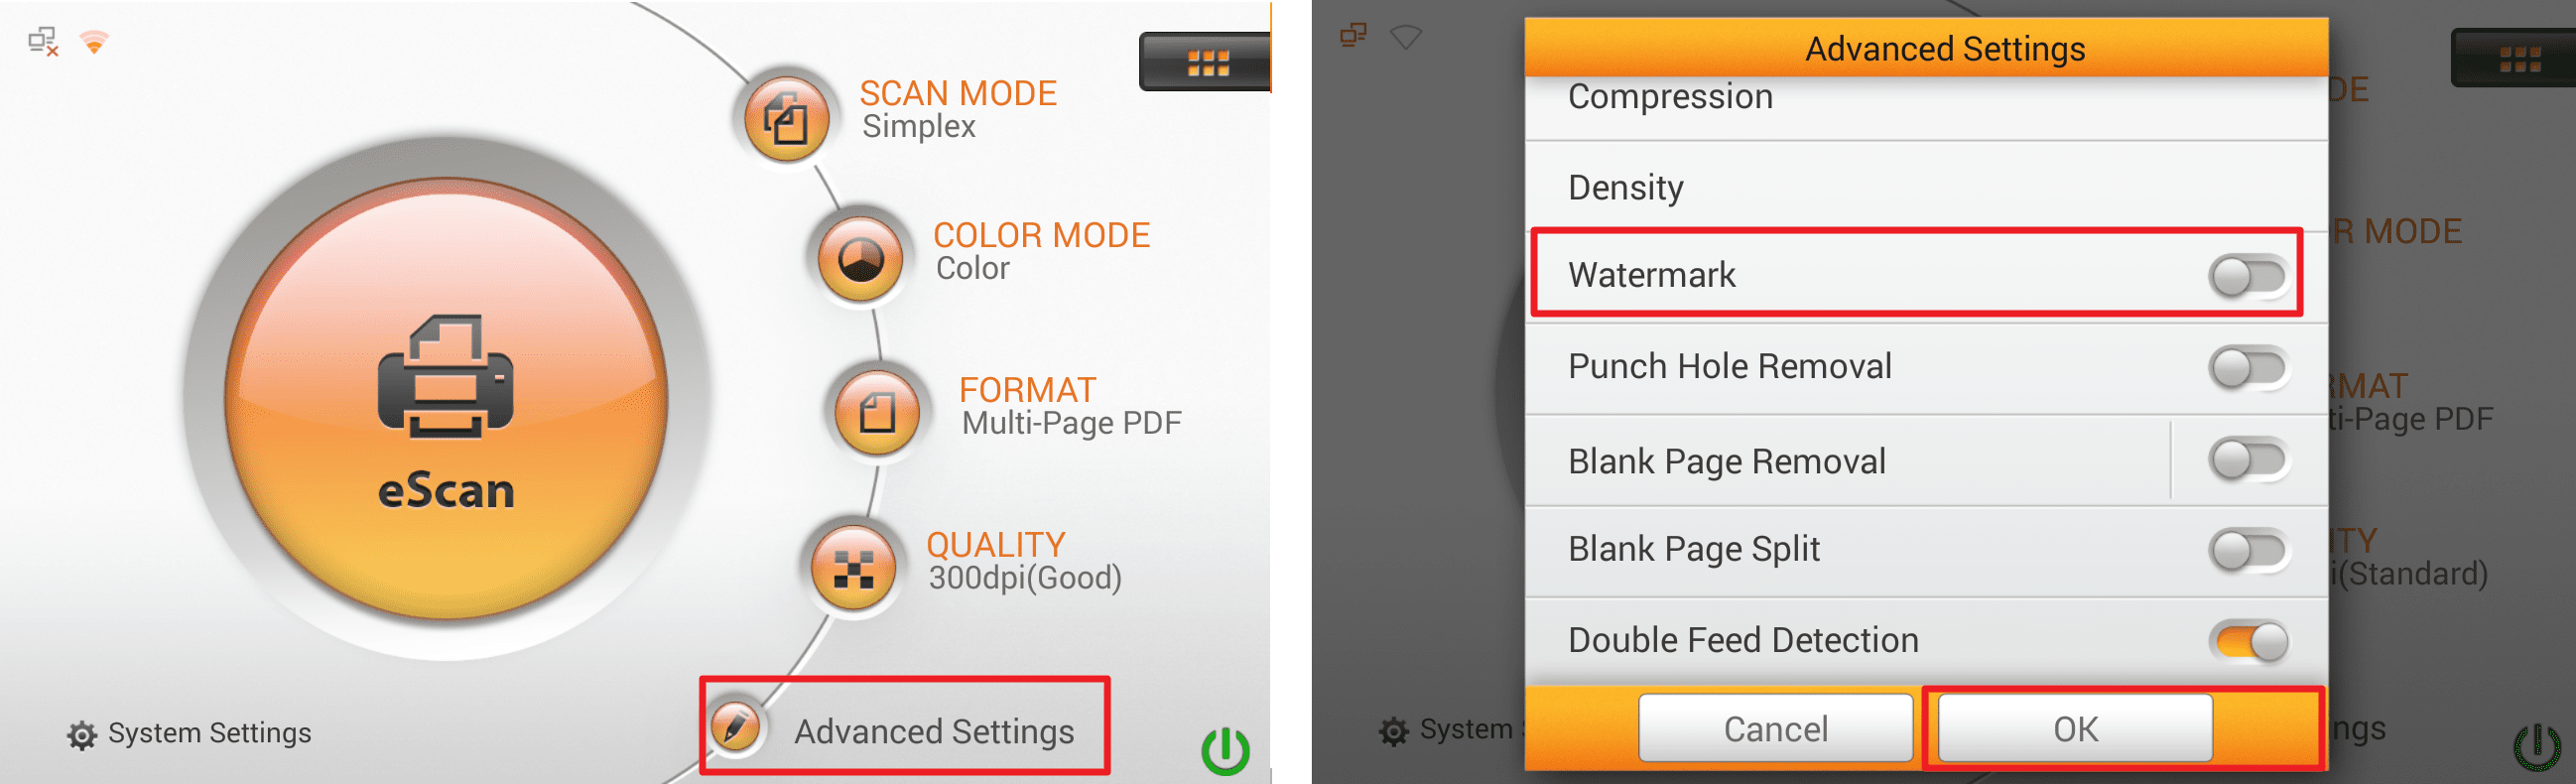
To add a watermark on the document, you have to set the relevant settings in the "Initial Settings", then enabled/disabled watermark function in "Advanced Settings".
1. Go to the folder which you download the zip files from Plustek.
Click to enlarge image
2. Tap on "Watermark" then select "image or text" to activate the watermark function.
 Click to enlarge image
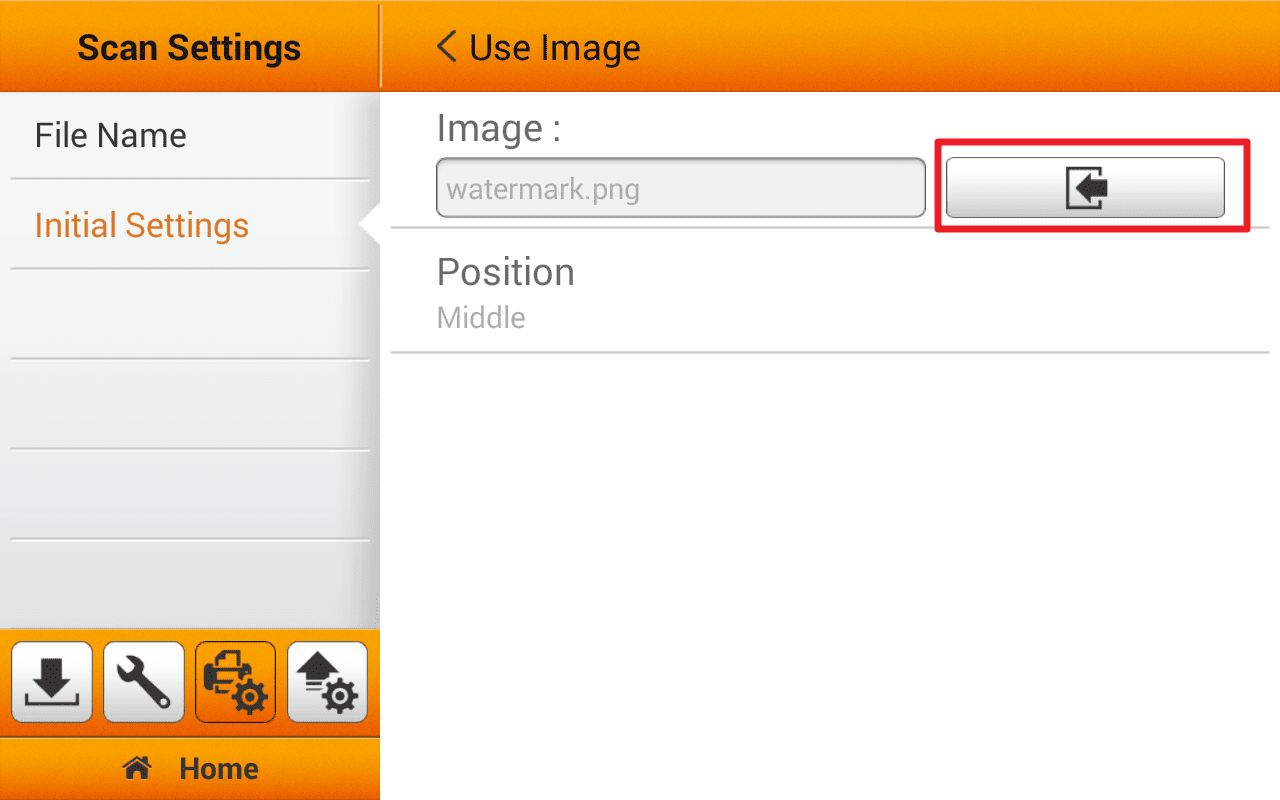
3.If you select Use Image as the Watermark, you have to upload the desired image and select the desired position. Tap the button to upload the desired image.
Please note, when using Image file for your watermark overlay, we strongly recommend that the image be no bigger than 800x800 pixels. [Recommend size and format: 600x200pixels; PNG]
The color of the image overlay will correspond to your scanning color mode. Please adjust transparency of the image accordingly.
Note: When scanning Black & White we strongly recommend the transparency setting to be set at 150%.
 Click to enlarge image
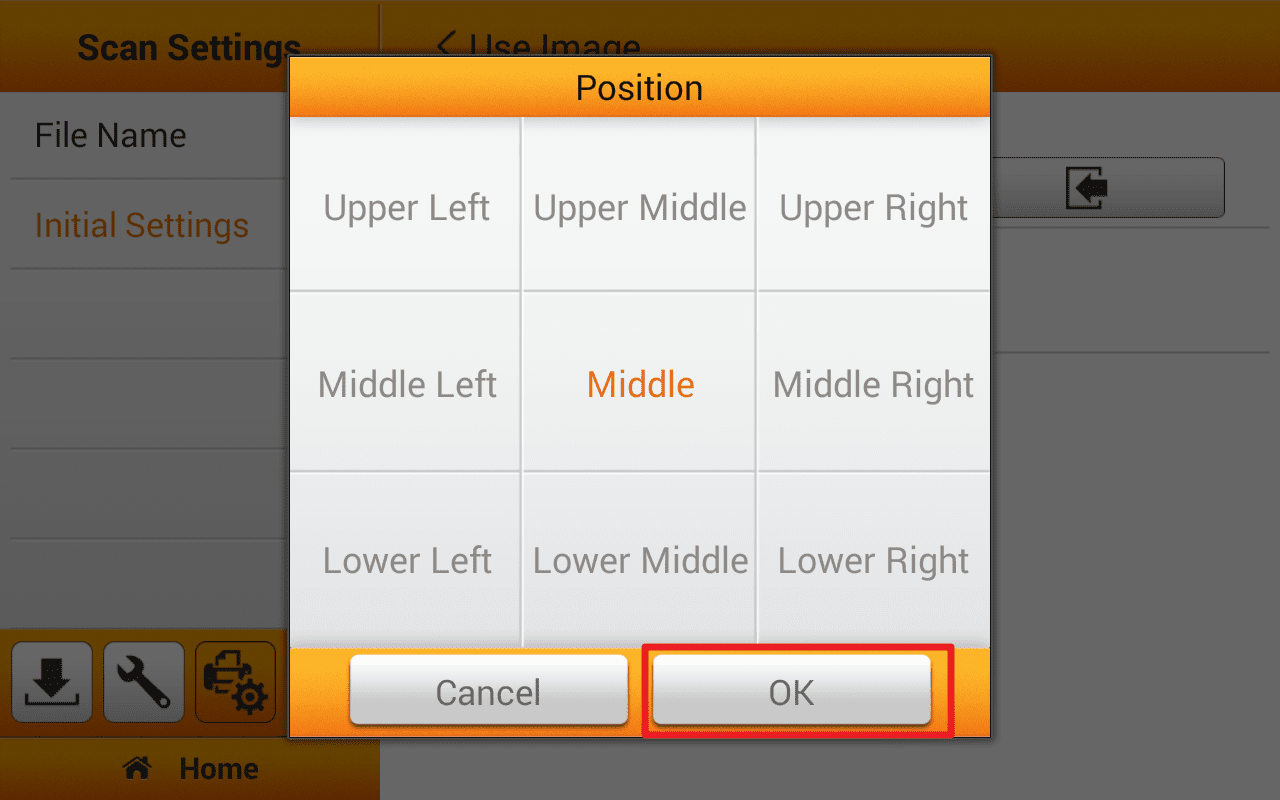
4.Tap on Position to select the desired position. There are 9 positions to choose from. Tap the OK button to confirm the settings or tap Cancel to exit this dialog.
 Click to enlarge image
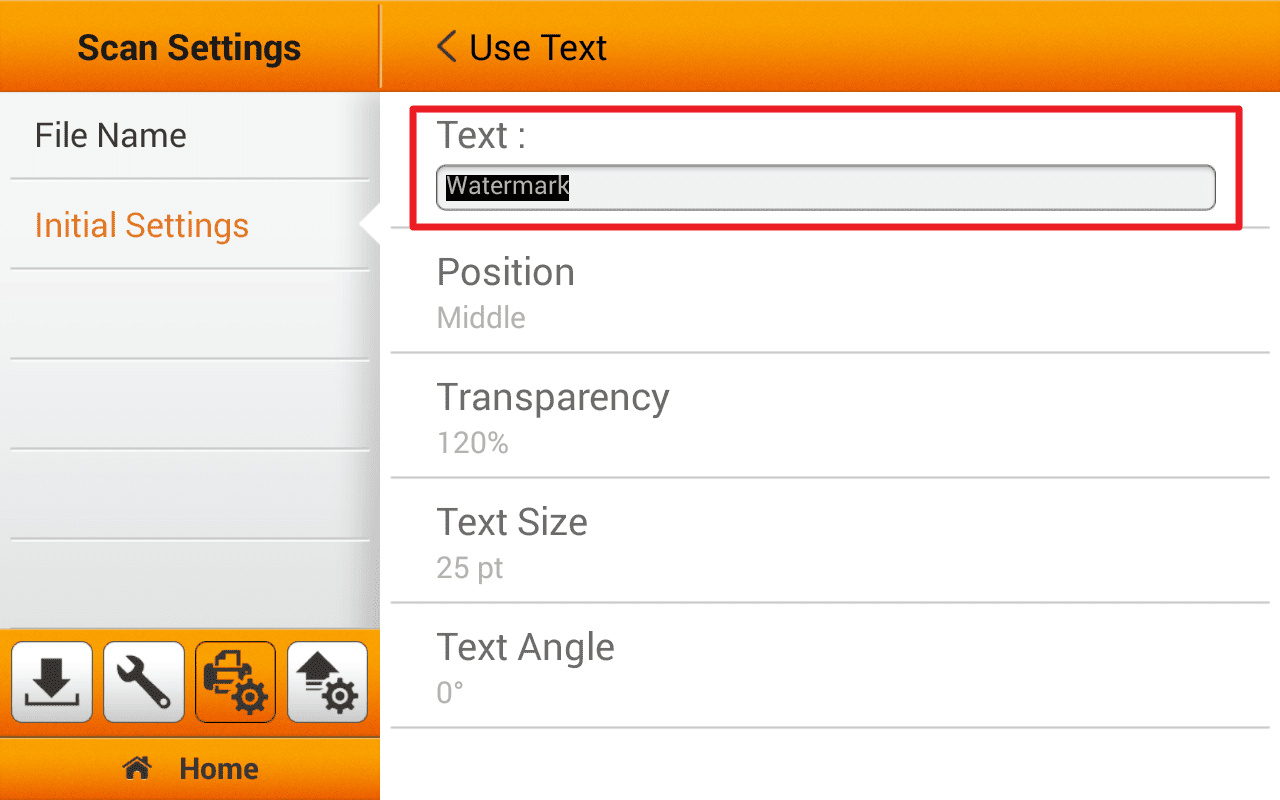
5.If you select Use Text as the Watermark, enter the desired text, select the desired position, and adjust the Transparency, Text Size and Text Angle.
 Click to enlarge image
6. Once you enabled "Watermark" function in the initial settings, the default settings of every scanned document will contain with watermark. If you want to disable this function, go to advanced settings then turn it off.
 Click to enlarge image
