| Configuring Settings dialog
|


|
|
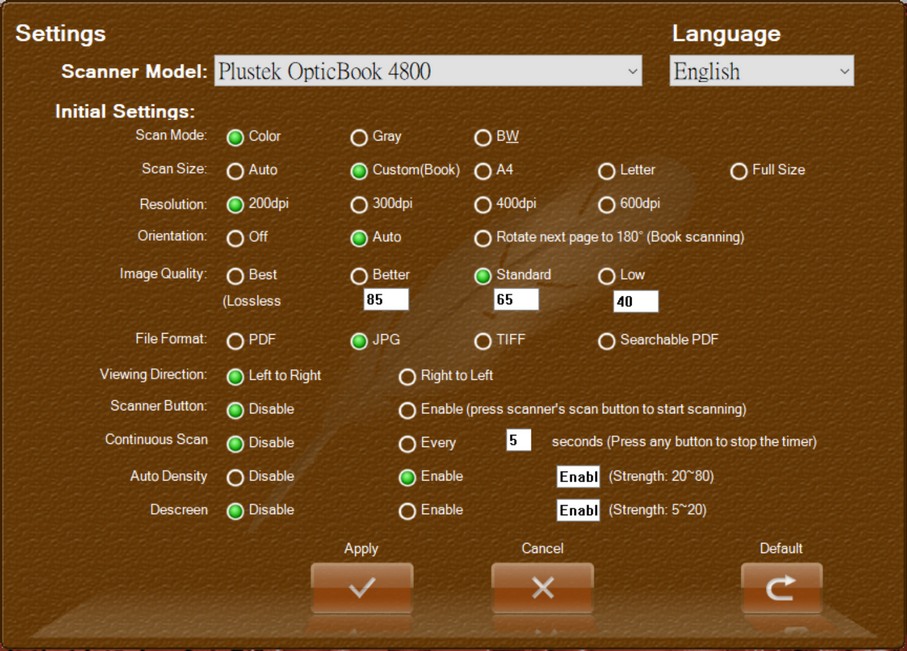
| Before you start digitizing your collection of books, we recommend entering the Settings dialog first to adjust the image and file format settings. These settings will be loaded on every start of the application and can help you to get started more quickly.
|
| If you need to change some or all of these settings for a specific scanning project, you can also use the Scan Setting Toolbar located in the lower right corner of the main window to adjust them.
|
|
|
|
|
|
| · | Scanner Model: The currently selected scanner. If you have more than one Book series scanner installed on your computer, you can choose which scanner to use from the drop-down list.
|
|
|
| · | Language: Select the desired language from the drop-down list.
|
|
|
| · | Initial: The following settings are all loaded on every start of the application. With the exception of the Orientation, View Direction and Scanner Button options, all settings can also be changed directly from the Scan Setting Toolbar.
|
|
|
| · | Scan Mode: Select the color mode. Available color modes are: Color, Grayscale and Black/White.
|
|
|
| · | Scan Size: Select the paper size. Available options (vary between scanners) are: Automatic, Custom, A4, Letter (8.5"x11"), and Full Size.
|
|
|
| · | Resolution: Select the scan resolution in dpi (dots per inch). Available dpi values are: 200 (normal text), 300 (small text), 400 (business card), and 600 (extra small text).
|
|
|
| · | Orientation: Select the orientation to assume for the scanned images. Available options are: Off (images are imported as scanned), Auto (program will attempt to determine the correct orientation), and Rotate next page by 180º (Book scanning) (rotates every second page by 180º).
|
|
|
| · | Quality: Select the quality of the scan. The higher the quality, the larger the resulting file. You can customize the quality options by entering new values in the fields. Available quality options are: Best (Lossless), Better, Standard and Low.
|
|
|
| · | Format: Select the file format to save the scanned images. Available file formats are: PDF, JPG, TIFF, and Searchable PDF. The bundled OCR software is required to install on your computer for the Searchable PDF format. This program only supports bundled OCR software. The availability of the OCR software may vary depending on the scanner model you purchase.
|
|
|
| · | View Direction: Select the viewing direction. Available options are: Left to Right and Right to Left.
|
|
|
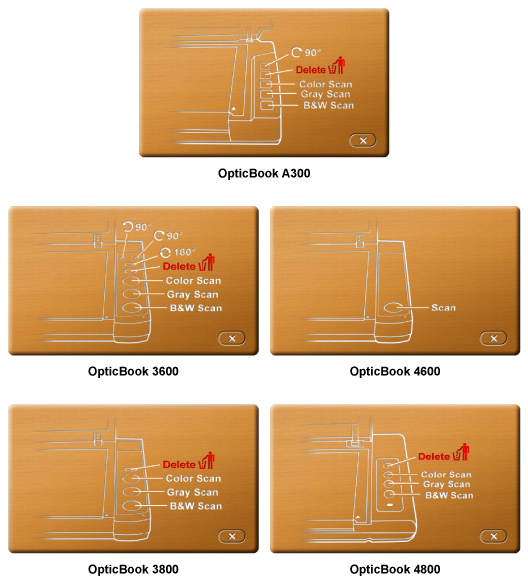
| · | Scanner Button: If you select the Enable option, you can use the scanner buttons to operate some program functions. You must exit all other button utility programs such as Book Pavilion, DocAction and Action Express to operate the scanner buttons. The following figure illustrates the button functions defined in this program. Some of these functions are different from the predefined scanner button functions that are printed on the scanner.
|
|
| · | Continuous Scan: If you select the "Every X seconds(...)" option, you can have the scanner automatically continue scanning after the specified delay. Please enter a value between 1 to 15 (5 to 15 recommended). A timer will be shown on the screen to inform you of the remaining time before the next scan will begin. During the scanning process, you may press any scanner button to stop the scanning task.
|
|
|
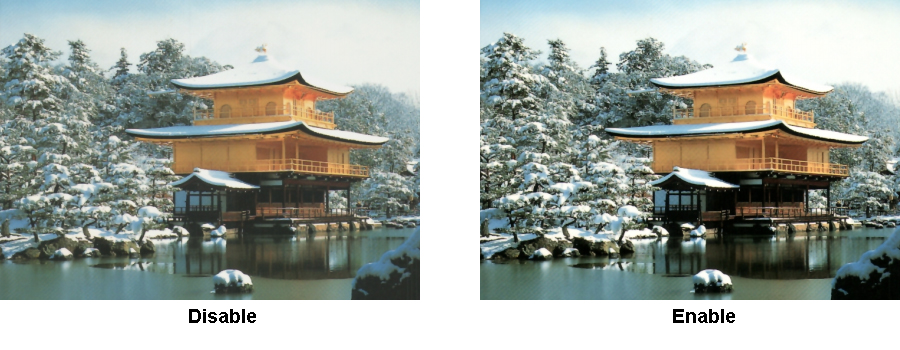
| · | Auto Density: Auto Density defines the lightest and darkest pixels in each channel as white and black and then redistributes the intermediate pixel values proportionately. Checking this box automatically adjusts the Histogram, to make the scanned image clearer. It does this by increasing the difference between color tones. In general, the Auto Density feature gives good results when a simple contrast adjustment is needed to enhance an image with an average distribution of pixel values. This feature is not available when Black/White is selected as Scan Mode.
|
|
|
| The higher the value, the greater the effect, and it takes more time to process the image.
|
|
|
|
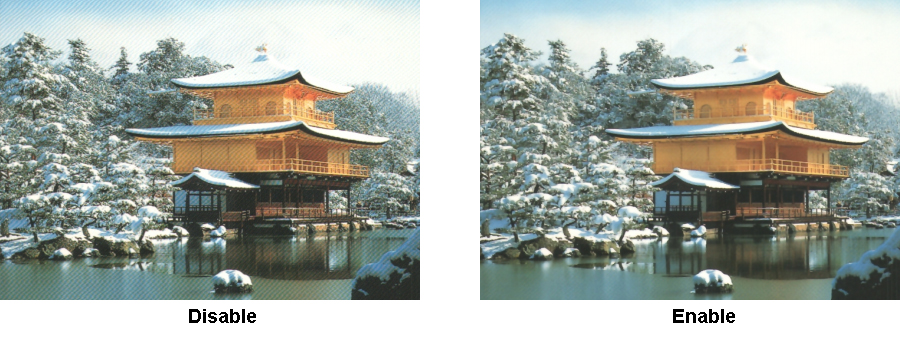
| · | Descreen: Descreen applies filtering to images that contain moiré patterns (or herringbone). A moiré pattern is created from scanning pictures in magazines, or printed material that use color dithering. The descreen filter is not needed when scanning original photographs or black and white images and text, but is recommended when scanning any printed color graphics, such as a page from a magazine, in order to remove the unsightly interference patterns which may occur. This feature is not available when Black/White is selected as Scan Mode.
|
|
|
| The higher the value, the greater the effect, and it takes more time to process the image.
|
|
|
|
| · | Apply: Click this button to apply all changes and return to the main window.
|
|
|
| · | Cancel: Click this button to cancel all changes and return to the main window.
|
|
|
| · | Default: Click this button to revert all settings to their default values.
|
|
|
|
|